Daniel Harvey – CV & Project Booklet

Daniel Harvey – CV & Project Booklet

4

Daniel Approached me around August last year wanting to re-design and update his CV. Originally the brief that was given was to create a simple, 2-sided layout, as you would expect.

Skills and Software involved:

  • Layout
  • Typography
  • Printing
  • InDesign
  • Photoshop

Daniel Harvey CV 2010 (Daniel’s old CV)

I am not suggesting that these CV’s should be copied, I need something more subtle and professional looking but they are worth a look.

– Daniel

cv example 3 cv example 2 cv example 1

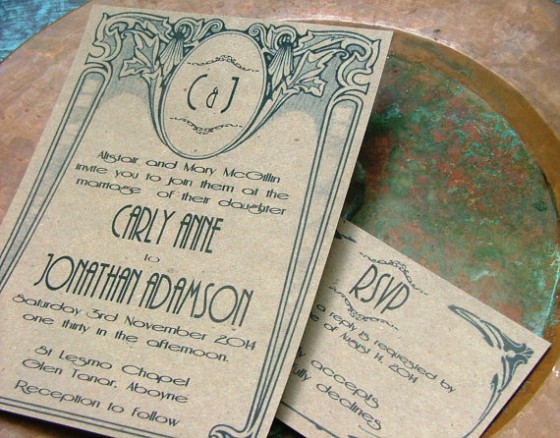
In our preliminary discussions via email, he provided me with these examples, as well as his current CV and project booklet. He asked me to come up with some ideas, an estimation of time and cost and then get back to him. After some thought, I decided to propose going for a Bauhaus style. I sent over some images to him and my thoughts.

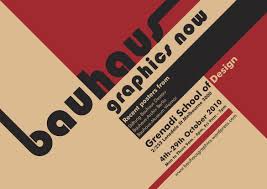
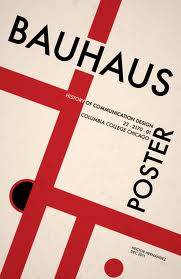
As for style, what immediately came to mind (or heart), was Bahaus. I think the red/black work well with each other to both grab attention and convey professionalism. I think that navy blue, shades of gray and green could also be possibilities. It really depends what ‘feeling’ you want to communicate. I have attached a few examples to illustrate my thought, I will not be giving a literal interpretation of this style, but will take inspiration from the layout, colour and typography. We can tweak it endlessly until you are 110% satisfied with it.

– Joe

images index page1-593px-Bauhaus_and_Bauhaus_93_Typeface.pdf

To which Daniel responded with:

I love the Bauhaus idea that is genius I particularly like the first two posters you attached. I like the idea of red and black but not stark black and bright red as this is quite ‘engineering’ and can look quite hard. The Bauhaus seem to use a more cherry red with a slightly off black black to reduce the starkness. I agree the introduction of other colours could be interesting.

– Daniel

Example


I quickly put together this design to get the ball rolling.

Working with Daniel was highly enjoyable, yet unexpectedly challenging. As an architect, he was very precise and picky about what he wanted. It took a great deal of time and reflection before we even started to get close to something that we were both happy with.

I have very specific ideas with what I would like, and have found some examples of well-designed CV’s that I have found on the internet. However I am open to any suggestions. The CV’s I have found are for graphic designers. Obviously being an architect I will need a different feel and extremely professional and clear and impressive design and layout and choice of colours. The examples will help as a starting point and it can evolve from there. I need to come across as a strong designer as well as a strong team leader and experienced architect and this need to be seen in the first 6 seconds of someone receiving my CV!

– Daniel

My deadline for the presentation to the university for this project is next Monday so after that I intend to work on the CV. However I have has a few ideas just now. Previously I created a cv booklet that contained a CV plus a mini portfolio with examples of my work with a cover letter presented in a top quality envelope. This proved very successful and I wish to do something similar.

 However I was wondering whether a better approach would be to create a standalone CV which was a double sided piece of thick quality card (I will get this printed professionally) where the design of the CV ran from front to back with key lines, block of colour etc lined up on both front and back. Do you know what I mean? Someone will hold it and think how clever this is… (lets employ the fellow)

 The mini portfolio of work will be a separate thing that can follow the same design principles as the CV.

 Also I was thinking about colour. I still love the Bauhaus idea but I have been been a fan of red and black. The company I work for now is red and black and it just doesn’t work.

– Daniel

RIBA Journal (PDF)

He provided a page from the RIBA Journal (linked above) to give me a better idea for the colour, style and layout for the CV.

Here’s another image to illustrate:

So as we can see, there is a lot of white space, the imagery becomes the focus and the typography is simple, crisp and clean. At this point we were beginning to think about a project booklet, rather than just a CV by itself as Daniel had a large amount of projects that he wanted to present to his potential employer, all in the same place.

Projects 2010-2013 (PDF) Here is the original project booklet that he was using.

It was at this point I realised I was not just designing a CV. I had misunderstood the original emails that had been sent to me. I thought that we were going to have a couple of projects from the booklet on his actual CV, but as things developed we decided it would be much more effective to have them in a separate section. This would quite literally ‘add weight’ to his CV.

From this point I started to re-work the CV with different colours and a much lighter style that was more similar to the RIBA Journal that he provided me with (I also had a physical copy of it temporarily to find inspiration and guidance from).

Mockup2 Update 1

Project Booklet Draft

I also started drafting the project booklet at this point, in-line with the new style that I was developing for the CV. I sent over the mockup example above to collect feedback.

You are a master.

I will look at it properly tomorrow but at first glance I love what you have done and so does lilley.

Glorious man.

– Daniel

He then sent over some visual feedback at a later date:

photo

Up to this point, I was still working on the CV in Photoshop. This presented more problems than it solved. I had been avoiding using InDesign as I didn’t have much experience with it. I decided that now was the time to learn. I started re-building the CV in InDesign.

 CV 1 (InDesign PDF)

I mailed this over to Dan who came back with:

Joe, each time you send an update it looks better and better. This looks great. Please find some initial comments attached.

I am wondering if we need another colour like fuchsia pink for the main headings?

Also what would it look like if we shuffled it all up on the right?

Is this in InDesign now?

Thanks

– Dan

photo

I made some more changes:

CV 2 (InDesign PDF)

Needs designing as 2 pages together possibly with colour running over both pages?

·   Only needs ‘daniel harvey chartered architect’ on fist page

·   Remove blocks of text on second page to give more space. Use the text left over to set ourt and I will refine text over the weekend.

·   Only need address and details at bottom of each page

– Dan

By now we were starting to get somewhere. The working relationship was developing well and we seemed to understand each others ways of doing things, there was no friction at any point.

After a lot more pinging ideas and designs back and forth, we ended up with this. The style started to change quite dramatically when developing the project pages, which then influenced the CV pages. We were now starting to lean much more towards the style of the RIBA Journal.

CV & Project Booklet Development

Hello joe
Just seen and love it!! Keep going, nearly there!
Will call tomorrow morning?Sent from my iPhone

From this point it was a case of collecting all the images and information that was to go into the project booklet. The CV text was also revised several times before we finalised it. Eventually, we met up and Daniel passed over to be a folder with all of the projects that he had worked on. This made it much simpler for Daniel to then refer to specific projects as we were not going to include all of them in the booklet.
Before this, he was sending over projects 1 at a time by email and it was becoming confusing keeping a track of all the content.
Screen Shot 2015-05-17 at 16.20.14
Laying out such a large amount of content was certainly a challenge. Making sure that everything looked balanced, even and easy to read. I’d never done anything quite like it before and was kind of like doing a jigsaw. Once I had come up with the basic layouts for the pages, I was then able to duplicate sections across and tweak things as necessary. Many hours went into this part of the project.
Screen Shot 2015-05-17 at 16.24.32 Screen Shot 2015-05-17 at 16.25.04 Screen Shot 2015-05-17 at 16.25.15
Over the course of the development we also discussed different ways in which Daniel could print and present the booklet. Looking at things such as:
We also discussed different papers and printing techniques such as gold foiling.
Once we had the CV and booklet finalised, Daniel sent a digital copy off to a company that he was hoping to meet with. There was then a period of silence as we were both busy with other things. When we came back together, Dan had got a copy printed off for us to go over in person to make some more final amendments.

Final Revision

3 2 1


Client Work – Mode20 – Branding, Web & Print Design

Business Card 1

Project Link

Print outcomes:

IMG_6888 IMG_6880 IMG_6877 IMG_6883 IMG_6878

This is one of the largest projects that I have undertaken in my 5 year career as a graphic designer. Beth was setting up a weddings and events business. Together we created a brand identity, website, blog and print material to support her self-promotion.

In this post I will go into detail regarding the process that we went through, challenges we faced, what I learnt and conclude with a reflection of the final outcome.

After our initial conversations we agreed on a price and started to think about the website, Beth came up with a list of pointers.


  • Ease and accessibility for clients. I want the website to be very user friendly, very accessible and very compact. I don’t want anything that’s too overly fussy, difficult to use or all over the place. Very user friendly and easy to navigate 🙂

  • Needs to reflect a professional, organised business. Again, similar to the first one, the website needs to be organised, compact and user friendly. However I also want the website to reflect a professional business. Well put together, sleek and polished. I know some people like the quirky, rough around the edges style but that’s not really what I’m going for.

  • Aesthetically pleasing. Obviously one of the main reasons women hire wedding planners is for wedding design and styling. So the website needs to reflect someone who is very capable of putting together something stylish, well designed and polished.

  • Approachable and warm. Probably stupid to say but the website needs to reflect a very approachable, warm and friendly business. No cold colours or fonts etc… Want to keep it very warm and approachable.

  • Stands out/different. I want something that is different. You wouldn’t believe the amount of wedding planners that use the same format and same colours. It’ll reflect in the examples that I send you below. I really want something that is different and strikes a chord.

She also provided a list of examples that she didn’t like:

And a list of examples that she did like:

As well as more things she didn’t like:

  • Colours – Black, Dark grey, brown, red, orange, purple, hot pink, navy blue. I don’t want any tacky colours or colours that are dark and gloomy.
  • Fonts – I don’t like websites that just use basic fonts throughout
  • I don’t like websites with too much text!

And more things she did like:

  • Pastel colours (soft pinks, mint greens, baby blues etc…)
  • Classic styles (such as ‘Caroline Gould Weddings’).
  • I really love the very classic, timeless black and white style
  • Picture links
  • Unusual fonts
I really like how ‘Carmen Weddings’ has that ‘Inspired. Tailored. Unforgettable’ slogan beneath her header, I think that’s a really nice touch.
I’m leaning towards a merge of a very clean, timeless and classic style (such as ‘Caroline Gould Weddings’) with a bit of an ‘Always Andri’ twist 🙂
I think i’m also leaning towards an unusual colour combination. A lot of wedding planners are using the same old pastel colour combinations and, although I really like the pastels, I think it’d be nice to try and strike a really unusual coordination of colours 🙂
At this stage I had begun drafting ideas for the logo. Before that however, we created a list to help define the style:
  • 1920’s/The Great Gatsby
  • Rustic
  • Vintage Glamour
  • Sparkles and Diamonds
  • Classic Black Tie
  • Extravagant Floral Arrangements
  • Personalised Stationary
  • Metallics


So with this information, I did some research into 1920s styles and looked at a range of ‘rustic’ and vintage designs.

I also researched into the Art Deco movement which first appeared in France after the first world war and began to spread internationally throughout the 1920’s, 30’s and 40’s when it’s popularity began to decrease.

It is an eclectic style that combines traditional craft motifs with Machine Age imagery and materials. The style is often characterized by rich colours, bold geometric shapes and lavish ornamentation.

art-deco-design-7a_431_1333020144_320x320 art-deco-manip-2 living-room media_1356327301207 stair-art-deco

So you can see where we started to get ideas for the colour, shame and form from.

2006al2561_pollitzer_african_panel_custom_290x394_06200843 2006al4802_bonfils_paris_1925_poster_290x435


One of the most prominent practitioners of this period was a guy called Charles Rennie Mackintosh. Born in Glasgow, 1868, he worked as an architect, painter, designer and graphic artist. He was a pioneer of the late 19th century Arts and Craft’s movement.

Charles Rennie Mackintosh’s later works are, unlike his earlier designs, which were organic in conception, distinguished by a stringently geometric style, which often unites the opposites light and dark, black and white, masculine and feminine, modern and traditional.

After further discussion and brainstorming, we narrowed it down to looking at 1920’s broaches for inspiration and also developed the name ‘Mode20’.

Mode refers to a style or ‘trend’ within fashion, and the 20 refers to the 1920’s as this is Beth’s favourite style.

Here’s a picture of the brainstorming:

IMG_6803

And the broaches:

1bf1ab7863bcc131d1ad4e040c770d0f art-deco-brooch-20s 2 il_570xN.185083622 sterling-silver-pendants-art-deco-p3054 Unknown


With these, I drafted out some concepts for the logo. I used black ink and tracing paper to take the outlines of the shapes and then scanned them in, dropped them into Adobe Illustrator and digitalised them to create the mockups.

1 2 3 4

After more discussion and reflection, we decided that there was only one of the icons that really worked. I then went and developed this idea further, generating numerous concepts and ideas.

For the majority of our conversations and meetings, we used Skype. Other times we would meet up in person when we needed to work more closely together.

Here are the idea sheets as we worked through and developed the style. We kept going back and forth through different colour schemes, fonts and layouts. As we progressed, we leaned more and more towards a more modern yet elegant presentation that really allowed the iconic logo to speak.

Ideas 1-01 Ideas 1-02 Ideas 1-03 Ideas 1-04 Ideas 1-05 Ideas 1-06 Ideas 1-07 Ideas 1-08 Ideas 1-09 Ideas 1-10 Ideas 1-11 Ideas 1-12 Ideas 1-13

I also came up with some mockups/concepts of what some of these ideas could look like in situe.

Ideas 1-08

Slip&Card CardsLetterhead BusinessCard2

At this stage, things are still quite ‘rough’ – we’re developing the concept and not yet focusing on the details / refining.

We eventually decided to go with this concept (2nd down), the black and gold:

Ideas 1-11

We had started to think about the website and other material that would need developing. Beth came up with some basic drafts of how she imagined it to be, from which I started to develop some concepts.

IMG_0037 IMG_0038 IMG_0039 IMG_0040

Draft 5


Draft 6


V2 Draft 1

We both liked different elements from these concepts. The boxes we thought worked well, but there needed to be more white space so that the content had room to breathe.

With a clear idea of what we wanted in mind, I started to work directly in Adobe Muse to build the website. This was the first time I had used this software and so I spent around a month getting to grips with it and learning what it’s capabilities were.

Screen Shot 2015-02-26 at 15.12.06

Screen Shot 2015-02-26 at 15.16.01

I found it very easy and straight-forward to use. It allows the designer to take full control with little to no knowledge of HTML or CSS. I do have an awareness of both coding languages which assisted me in adding extra functionality to the website.

A live preview can be seen at http://www.mode20.co.uk

Screen Shot 2015-02-26 at 15.14.18

We also worked on the SEO for the website to make sure that it gets picked up by search engines such as Google.

As part of the branding, we picked out and purchased a variety of stock images to use on the promotional material and website.Screen Shot 2015-02-26 at 15.17.04

We also did a photography shoot to get images of Beth to use on the website:

2 6 7

So, a summary of everything that we have done:

  • Create an iconic logo / brand
  • Design and Develop a fully functional website
  • Integrate the brand with social media channels
  • A photography shoot
  • Designed print materials (business card, letterhead, compliment slip, greeting card and flier)

Throughout the project it was extremely important to get frequent and honest input as to how things were progressing. Ultimately, Beth needed to create a platform from which she could run her business effectively. It wasn’t just a case of designing things that looked nice, but also taking into consideration her target audience, what are they looking for, how are they most able to engage with the content.

It’s a competitive market, as any area or kind of design tends to be, so making it stand out and look different was essential. The black and gold works effectively to create a sense of importance and yet still remains elegant with the softer, elegant icon / logo. We specifically chose feminine, colourful imagery to balance out the branding, as black can come across as quite masculine / overpowering in some cases.

Here are some more previews:

4 13 Envelope 8 7

For this project I have had to utilise the entirety of my skill-set and more, I have learnt how to use Adobe Muse effectively and efficiently to build websites that are SEO-friendly and engaging. I have learnt more about designing and preparing material to go to print. I have learnt how to work with a client on a large-scale project and effectively manage my time to ensure that deadlines were met.

The project did take much longer than we both anticipated – there was no specific deadline, so we were both able to relax. It was very informal and a strong trust was developed between us, meaning we could rely on each other to get things done and use email / Skype for communication as necessary. As it started getting nearer to January, we decided that we did need to define a more specific deadline – and decided on February the 2nd when her website went live.

I am aware that various things haven’t been included in this post, such as the development of the flier, compliment slip and greeting card. I lost a portion of the development work that I had stored on an external HD which was damaged and unrecoverable.

Personal Client – Stewart King

Image

Stuart approached me just before December, calling upon my design abilities. He wanted to completely re-design and re-structure his business’ online presence. His current website was not hugely effective in conveying his message or information. The navigation was somewhat non-existent and I found myself having to use the ‘back’ button on the browser, to get back to the homepage and navigate from there. I sent an initial proposal of what I could do for him in early January.

We then had a meeting on Skype to discuss what it is exactly that he wants – after he had sent a brief across to give me a rough idea. I will be completely re-designing everything, the logo, stationary such as the letterhead, business cards and invoice and also the website which will be fully responsive and work across all devices. I will also be helping Stewart to create and get his online presence going.

Here is some more work that I have done today and earlier this week:

Invoice

Image

Letterhead

Image

Web Design (WIP)

Image

Website 2(2)

Personal Portfolio

www,joemillion.co.uk

If you would like to see some of the projects that I have been working on over the past couple of years, I have chosen my favorite pieces to go onto my personal website. I enjoy all kinds of design, but my strongest areas are web and interface. I like print work and I have quite an abstract, strange illustration style. I have been working freelance since I was fairly young and have had all kinds of experience in working with clients local and overseas, as well as on-site at a print company.

I also contribute to various different social design/development networks to get feedback and see what others are working on. Forrst is the one that I keep most regularly updated and I have a bunch of invites, if anyone feels that they would benefit from having one :).

https://forrst.com/people/JoeMillion